Coconut Waffles with Dark Chocolate Drizzle

DSC_0319.JPG

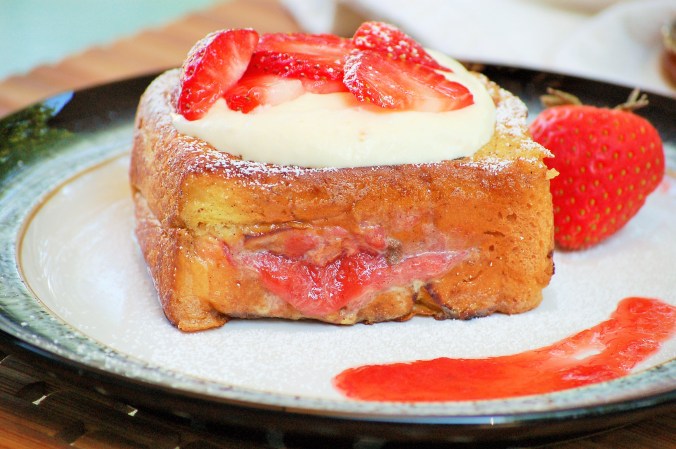
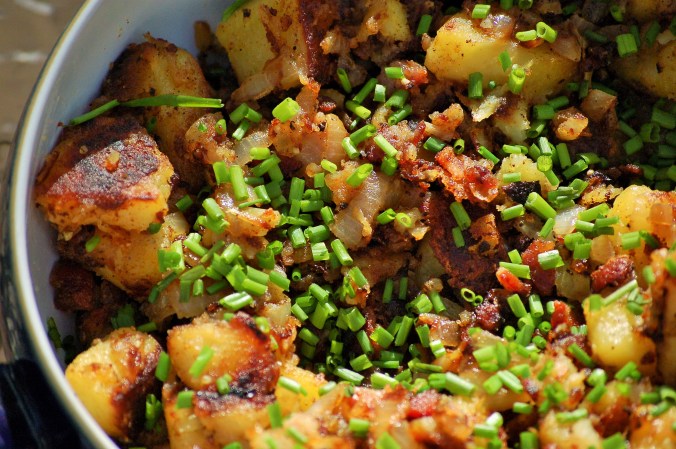
Growing up, I was always aware of how lucky I was to have 2 gourmet cooks for parents. Saturday mornings in the summertime meant one thing in our house: Belgian Waffles. Whenever I had friends sleep over, their eyes would light up the next morning when my Mom would whip up a batch of fluffy Belgian waffles like it was no big deal. I have to say, my parents kind of ruined me for going out to breakfast. When you have Papa’s crispy fried potatoes and eggs, Mom’s waffles (and her quiche, and her frittatas, and the list could keep going…) it’s a little hard to enjoy breakfast out at a restaurant because it rarely is able to compete with the stuff I grew up eating.

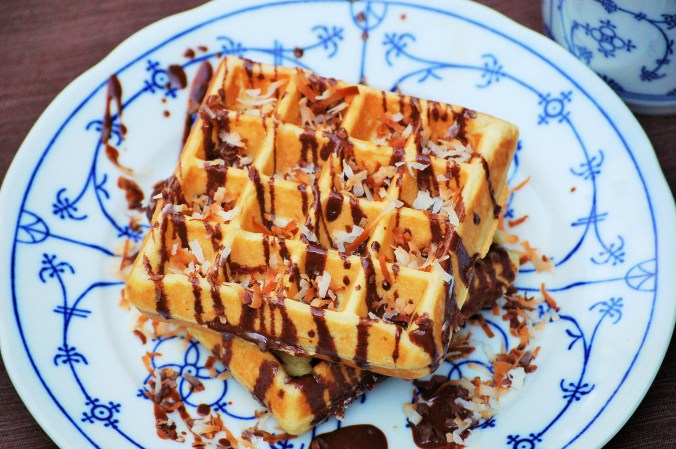
Because my parents taught me the basics on how to make so many different dishes, I now take joy in finding ways to reinvent them. That’s what cooking is all about– exploring new ingredients, new twists on classic recipes. I love chocolate and coconut, so why not put the two into waffle form? Honestly, can anything come in waffle form and it not be exciting?!

DSC_0320.JPG

I’m a chocoholic, so I’m always looking for any excuse to incorporate chocolate into breakfast—enter coconut waffles with dark chocolate drizzle. I decided to take the basic waffle recipe my Mom has always used and I added in some sweetened coconut and made a quick dark chocolate coconut sauce to go over the top. The result is a sinfully sweet, fluffy, coconutty, chocolatey waffle. I stuck closely to the original waffle recipe and used regular milk, but I might try using coconut milk next time to ramp up the coconut flavor even more.

If you’re feeling a little naughty and you want dessert for breakfast, make these waffles—you won’t be sorry!

DSC_0317.JPG

Coconut Waffles with Dark Chocolate Drizzle  

Makes 6-8 waffles

Ingredients

3 eggs

1 ¼ cup milk

½ cup melted butter

1 Tablespoon vanilla

1 ¼ cups shredded, sweetened coconut flakes, divided

2 cups flour

½ teaspoon salt

1 Tablespoon baking powder

2 teaspoons sugar

4 oz dark chocolate, chopped

2 Tablespoons coconut oil


Directions:

  1. Preheat the oven to 350 degrees.
  2. On a cookie sheet, toast ½ cup of the coconut flakes in the preheated oven until golden brown, about 7 minutes. Set aside.
  3. Beat whole eggs in a bowl until thick.
  4. Beat milk, melted butter, vanilla, and remaining ¾ cup of the coconut flakes into the eggs.
  5. In a separate bowl, combine the flour, baking powder, salt, and sugar. Sift into the wet ingredients and mix well.
  6. For the chocolate drizzle: Combine the chopped chocolate and coconut oil in a small bowl. Microwave the mixture in 10 second intervals, stirring in between, until chocolate is nicely melted and smooth. Set aside.
  7. Griddle the batter in a Belgian waffle iron until golden brown. Drizzle waffles with chocolate sauce and top with toasted coconut flakes.

*Recipe adapted from Vilantonio “Quick Waffles” (recipe booklet)

Burrata Cheese with Arugula-Walnut Pesto, Roasted Tomatoes, Kalamata Olives, and Balsamic Reduction

Burrata.jpg

Last month, I vacationed with Eric and my family at Pawley’s Island in South Carolina. It was a wonderfully relaxing week off from grad school and I ate some spectacular food while we were there.  One of the true food gems down there is a little unassuming restaurant called Perrones. It doesn’t look like much from the outside, but I’m here to say it is one of the best restaurants I have ever been to in my life. Everything from the atmosphere to the cocktails to the food was phenomenal. Every single thing I tasted at this place was good.  It was so good that after we had dinner the first time there, we cancelled our dinner plans for the following night and ended up eating there 2 nights in a row. THAT’S HOW GOOD THIS PLACE IS. No joke.

Both nights we ate there, Eric and I could not decide what to eat because literally everything on the menu sounded so spectacular. So, we settled for sharing a number of small plates each night so we could maximize the number of menu items we could taste. One of their specials was a burrata cheese appetizer with arugula-walnut pesto, olives, roasted tomatoes, and balsamic reduction. As you may have already guessed, that is exactly what I am sharing today! That dish was so unbelievably good that I just had to recreate it at home. Using my memory and taste buds as a guide, I think my dish comes pretty darn close to what I had that night at Perrones (and Eric agrees)!

DAF43B54-.jpg

A few weeks after the beach, I came home and made this dish for my parents for lunch with some fresh crusty bread from the farmer’s market and a glass of Sauvignon Blanc. In a word: perfection.  This flavor combination gives you everything you could want on one plate: the creaminess from the burrata, the sweetness of the roasted tomatoes and balsamic reduction, the pepperiness from the arugula pesto, and the salty bite from the Kalamata olives. My favorite way to eat it is to get a little bit of everything and smear it over the bread.

I love going to a great restaurant and figuring out how I can bring those flavors into my own home. This dish is one way that I can preserve a memory from that trip to the beach and continue to relive it long after it has passed.

CED0A4AB-

Burrata cheese with arugula-walnut pesto, roasted tomatoes, Kalamata olives, and balsamic reduction

Serves 4

Ingredients

3 tablespoons balsamic vinegar

2 tablespoons of good quality olive oil, divided

4 slices of a good, crusty farmer’s bread

4 balls of burrata cheese

¾ cup of Kalamata olives


For the arugula-walnut pesto—

1 cup arugula

8 fresh basil leaves

2 heaping tablespoons of toasted walnuts

1 clove of garlic, peeled and cut in half

½ cup good quality olive oil

¼ cup freshly  grated Parmesan cheese

Salt and freshly cracked black pepper, to taste

For the roasted tomatoes—

1 lb cherry tomatoes, cut in half

2 cloves garlic, finely minced

3 tablespoons olive oil

1 tsp sugar

Salt and freshly cracked black pepper, to taste

Directions

  1. Preheat the oven to 450 degrees.
  2. First, make your roasted tomatoes. Place the tomatoes (cut side up) and minced garlic on the baking sheet and drizzle with olive oil. Sprinkle over sugar, salt, and pepper and stir everything around to ensure that it is all nicely coated. Roast for 25 minutes.
  3. When the tomatoes are finished, reduce the oven heat to 350 degrees. Place the slices of bread on a cookie sheet and drizzle the slices with 1 tablespoon of the olive oil. Toast in the oven for 10 minutes. Set aside.
  4. Next, make your pesto. Combine the toasted walnuts and garlic in a food processor and pulse until coarsely chopped. Add the arugula and basil and continue to pulse until all ingredients are combined.
  5. With the motor of the food processor running, slowly drizzle in the 1/2 cup of olive oil until nicely combined.
  6. Remove pesto from the food processor and place into a small bowl. Fold in the Parmesan cheese, and season with salt and pepper. Set aside.
  7. Place the balsamic vinegar in a small saucepan over medium-high heat. Bring to a simmer and then turn down the heat to medium low. Simmer the vinegar for around 10 minutes, or until reduced by half. Your balsamic should be thick and luscious at this point.
  8. To plate everything, place the burrata cheese in the center of the plate. Surround the cheese with the pesto, roasted tomatoes, and olives. Drizzle the remaining 1 tablespoon of olive oil and the balsamic reduction over the entire plate. Serve with the toasted bread and enjoy!


Papa’s Fried Potatoes- Westfälische Bratkartoffeln

use 3

Today I’m sharing a recipe that has been in my life since I was a small child. In all the German-style potatoes I’ve had in my life, none of the Bratkartoffeln (fried potatoes) compare to my Dad’s. These are the potatoes he taught himself to make in college. They are the ultimate student food: cheap, easy, and comforting. Whenever he had to stay up late studying and needed a midnight snack, this was his go-to dish. According to him, these potatoes guaranteed a few knocks on his door at 2 AM when other hungry college students smelled the mouth-watering aroma of fried potatoes drifting through the halls late at night. Make these, and I guarantee you will get people wandering into your kitchen to see what smells so good!

The trick to making perfectly crispy potatoes is to LEAVE THEM ALONE. I mean this! When Papa instructed me as a young child how to cook these potatoes, not over-stirring the potatoes was rule number 1. They will never develop a nice crust if you keep turning them with a spatula (much like what I discussed in my last post about cooking mushrooms). In the 30 minutes it takes to prepare these, you probably only need to stir the potatoes 3-4 times. For best results, make sure you’re using a stainless steel or cast iron pan.

If you have a little more time on your hands, you don’t need to pre-boil the potatoes. Sometimes I just peel and dice the potatoes and fry them in oil, and you get the same crispiness but you have to wait longer for them to cook through. If you pre-boil your potatoes, you can fry them in butter and they will cook more quickly but still get a nice crust on them. Also, butter=flavor, so I’m a fan of the pre-boil method to get that extra layer of flavor in there.

use 1

And on a sweet little side note: To this day, whenever my Mom is sick, my Dad immediately cooks these fried potatoes for her. Fried potatoes may not be your first thought for food you want when you’re sick, but trust me—they have healing powers! They’re so savory and warm and comforting and honestly soup just doesn’t hold a candle to them. (Well, my Dad also makes a killer chicken soup… but that’s for another post!)

Serve these with fried eggs to complete the meal. Who doesn’t love a good egg yolk running around and gettin’ all nice and comfortable with crispy potatoes!?

use 2

Papa’s Fried Potatoes

Serves 4-5

Ingredients

6 tablespoons unsalted butter, divided

2.5 pounds potatoes (I used Yukon Gold), peeled

1 large yellow onion, finely diced

3 slices bacon, finely diced (optional—I usually make mine without to keep it vegetarian and they are delicious either way!)

1 tablespoon chopped fresh chives

Very fat pinch of salt & pepper

Eggs, for frying

Directions

  1. In a large pot, cover the potatoes with water. Over medium heat, allow the potatoes to softly boil for around 15-20 minutes. You want the potatoes to still have some firmness to them; you’re not looking to cook them completely through.
  2. Drain the potatoes and allow them to cool slightly.
  3. When the potatoes have cooled, cut them in half and dice them into bite-size pieces.
  4. In a large skillet over medium heat, melt 4 tablespoons of butter. Add the diced potatoes and once they are distributed throughout the pan, let them sit. Let them sit a good 5 minutes before you even think about picking up that spatula again.
  5. Stir the potatoes and add in the diced bacon. Let everything sit in the pan for another 5 minutes.
  6. While you’re waiting on the potatoes, melt 2 tablespoons butter in a medium skillet over medium-high heat and add the diced onion. Allow these to soften, about 5 minutes.
  7. Add the onion to the pan with the potatoes and stir. By this point you should be seeing a nice golden brown crust on your potatoes. Season the whole pan generously with salt and pepper. Top the potatoes with the fresh chopped chives.
  8. Fry desired amount of eggs in butter and serve alongside potatoes.

Caramelized Onion, Mushroom, & Gruyere Toasts

1F21BB29-

Remember when I said that German wine didn’t get enough recognition? When it comes to Alpine cooking, I feel the same way about mushrooms. When you think German food, usually the first thing that comes to mind is sausage. Germany certainly has some great sausages, but some of my favorite things to eat over there are the mushrooms. The ubiquitous German Pfifferlinge mushrooms are technically the same as the chanterelle mushrooms that we have here, but they are smaller and have a lot more flavor. I have always had a very hard time preparing mushrooms in the same fashion that you find them in Germany. Until now!

I discovered a great local mushroom supplier at the Greenville farmer’s market. Mushroom Mountain has some of the best mushrooms I have been able to find in the area. Some of my favorite mushrooms they have are the shimeji mushrooms. They are very small, so you can cook them whole and they have a perfectly tender texture.

0B4EED74-

Despite the fact that shimeji mushrooms originate in East Asia, The flavors in this mushroom toast make me feel like I’m sitting on a mountaintop in the Alps. Paired with a crisp white wine, this toast is a perfect lunch or light dinner.

I’ve met a lot of people who don’t like mushrooms. That’s totally fine, but I’m convinced that at least 50% of these people have not had mushrooms prepared the right way (Eric used to be one of these people—I have since converted him to become a mushroom lover 😉 ). All too often people cook mushrooms over low heat with barely any fat and stir them way too often, until they become a rubbery, watery mess. The way I cook these mushrooms, you get a nice golden brown crisp on the outside but a tender inside. Combine these mushrooms with beautifully caramelized onions, and the result is a buttery, mouth-watering mixture that would already be perfect on top of a good piece of toast. But, pretty much everything is even better with cheese, so I also added some nutty gruyere and topped it all off with some fresh thyme. You need this toast in your life. It is delicious!


4418E0B6-

Caramelized Onion, Mushroom, and Gruyere toasts

Serves 2

Ingredients

2 slices of thick-cut farmer’s bread

1 small onion, sliced very thin

½ lb shimeji mushrooms (if you can’t find these, cremini or shiitake mushrooms would also work great!)

Salt and pepper, to taste

5 tablespoons butter, divided

4 oz gruyere cheese, grated

1 tsp fresh thyme, chopped

Directions

  1. Preheat the oven to 350 degrees. Place the bread on a baking sheet and drizzle with olive oil. Bake for 10 minutes, or until they are golden-brown and toasty.
  2. In a medium pan, melt 2 tablespoons of the butter over medium-high heat. Add the onions and lower the heat slightly. Cook the onions, stirring occasionally, until they caramelize (this should take around 20 minutes). Remove the onions from the pan and set aside.
  3. Using the same pan the onions were in, melt the remaining 3 tablespoons of butter over medium-high heat. Add the mushrooms and DO NOT STIR. I know it’s tempting, but put down the spoon. Let the mushrooms sizzle in the hot butter for 2-3 minutes. This will allow them to crisp up and keep them from getting rubbery.
  4. Stir the mushrooms and let them cook through, about 2 more minutes. If the pan looks like it is drying out, add more butter.
  5. Turn off the heat, season the mushrooms with salt and pepper, and fold in your caramelized onions.
  6. Turn the broiler on high.
  7. Divide the mushrooms evenly between the two toasts. Top each toast with 2 oz of the shredded gruyere, and the chopped thyme.
  8. Broil the toasts for 1-2 minutes, or until the cheese is golden brown and bubbly.

Lox Bagels with Fluffy Ricotta-Chive Eggs, Herbed Cream Cheese, & Arugula

DSC_0245.JPG

If you’ve read the “about” section of this blog, you may have noticed that I said I cook and eat mostly vegetarian meals. Although I don’t usually cook meat or fish for Eric or myself anymore, I still eat meat occasionally and experiment with recipes for my parents. Sometimes you will see these experiments on the blog, like these bagels I made my Mom for Mother’s Day. These are sure to satisfy all of your brunch dreams!

This bagel looks and tastes like a million bucks, but trust me—it’s so easy to put together! Let me break it down for you, because there are a lot of different textures and flavors going on.

I know the smoked salmon is the star ingredient of the bagel, but I have to take a moment to gush about these scrambled eggs. If you’ve never put ricotta cheese in your eggs, prepare to be blown away. A few years ago, I discovered that a few dollops of ricotta cheese and a handful of chopped fresh chives do magical things to scrambled eggs. These eggs are so incredibly silky. I make these eggs every single time I do a brunch spread. They are seriously delicious!

Next we’ve got this herbed cream cheese. Everyone knows that smoked salmon + bagels + cream cheese are a match made in heaven, but I wanted to spice it up with some fresh herbs and lemon zest. The dill, parsley, chives, and lemon zest perfectly complement the richness of the salmon and give you a light spread for the bagel.

Finally, it’s all topped off with a small mountain of peppery arugula, simply dressed with olive oil and lemon juice. What more could you want in a bagel sandwich?

DSC_0243


Lox Bagels with fluffy ricotta-chive eggs, herbed cream cheese, & arugula

Serves 4

Ingredients

4 bagels (I used everything bagels), cut in half and toasted

8 slices of high-quality smoked salmon (I used Scandinavian-style Gravlax)

8 oz cream cheese, at room temperature

4 tablespoons chopped fresh chives, divided

1 tablespoon chopped fresh dill

1 tablespoon chopped fresh Italian parsley

1 teaspoon lemon zest

1 heaping cup of arugula

1 tablespoon olive oil

A squeeze of fresh lemon juice

5 large eggs

1 tablespoon butter

2 heaping tablespoons ricotta cheese

Pinch of sea salt


Directions

  1. In a medium bowl, beat the cream cheese until light and fluffy, about 20 seconds. Add in the dill, parsley, lemon zest, and 2 tablespoons of the chopped chives. Season with salt and pepper. Beat again until everything is nicely combined. Set mixture aside.
  2. In another medium bowl, toss the arugula with the olive oil, a squeeze of fresh lemon juice (about ½ of a lemon, depending on how juicy it is), sea salt, and freshly cracked pepper. Set aside.
  3. Scramble the eggs: beat the eggs in a medium bowl with the remaining 2 tablespoons of chives. Melt butter in a medium skillet over medium-high heat. Add the eggs to the skillet and gently pull them across the skillet using a spatula as they begin to set. When the eggs are almost done, turn the heat off and fold in the ricotta cheese. Sprinkle the eggs with sea salt, and stir everything together until eggs are light and fluffy and the cheese is nicely incorporated.
  4. To assemble the bagels, spread cream cheese on each bagel half. Top each bagel bottom with 2 slices of smoked salmon, a large spoonful of eggs, and a pile of arugula.

An Ode to Maibowle: A German Springtime Treat

DSC_0214

Everyone always associates Germany with great beer, and they certainly aren’t wrong. But in case you didn’t know, I’m here to tell you they are on top of their wine game. The first time I ever tasted wine was in Germany, and it only took a few sips before I was hooked on German wines! This post is less of a recipe and more of an informal how-to for creating a unique German wine cocktail.

Maibowle is a fruity, floral drink that you can find around Germany during the month of May. The key  ingredient is Waldmeister (in English, it’s called Woodruff). My Dad recently discovered that you can buy Waldmeister here in the states, so he bought some last year and planted it in the backyard:

DSC_0228

This is what it looks like before it blossoms, which is when you need to use it for Maibowle and other drinks. You simply take a few sprigs of Waldmeister, tie them together with string, and let them wilt in the sun for around 30 minutes. This helps the Waldmeister release its lovely aroma that will perfume the wine. After the Waldmeister has wilted, place it in a pitcher with a crisp white wine (we used a Pinot Grigio). Let this mixture infuse in the fridge for another 30 minutes or so, and there you have it! You can drink the infused wine as is, or top it off with champagne or sparkling water. Since strawberries are also in season, you could also place a few fresh slices of strawberry in the glass.

DSC_0222Here are my parents enjoying Maibowle. Aren’t they so cute?! I also had to snap a picture of this cutie, because he was happily gnawing on a piece of driftwood they brought him back from the beach:

DSC_0237

One day when I join the 21st century and eventually get a smartphone, I can tell you that my phone will be filled only with food and puppy pictures. Probably the only reason I would even want a smartphone would be for the quick availability of a camera to constantly photograph the dog. Seriously!

…But back to Maibowle.

The best thing about this drink is the aroma when you bring the glass to your nose. Words cannot accurately describe the delightfully herbaceous essence the Waldmeister has. If you can get your hands on some Woodruff, you have to try this drink! And if you can’t, come on over and I’ll make you a glass 😉

Prost!

DSC_0212

Strawberry Rhubarb Stuffed French Toast with Orange Whipped Cream Cheese

DSC_0203

My favorite things in the world right now are South Carolina strawberries. I don’t know what it is, but this season they are exceptionally good. When I was at the farmer’s market last weekend, I felt like the strawberries were calling out to me from every booth. I couldn’t resist. So a few days ago, I bought some and made this cake:

ACE99139-

Ohhh my. I first made this cake a few years ago, and I don’t know why it took me until now to make it again, because it is seriously delicious. It’s one of those cakes that you’re tempted to eat for breakfast because the next morning you see it sitting in the fridge and you have to question if it’s okay to eat cake at 9 AM. But you don’t have to! I have the solution:

DSC_0204.JPG

I wanted the flavors of this cake in a more breakfast-friendly format, and it came to me: Stuffed. French. Toast. Have there ever been three more beautiful words in the English language? Ask anyone who knows me, and they will tell you I have a thing for stuffed desserts. There’s nothing like the look of wonder when someone is surprised by a sweet filling. It’s basically like a present inside of a present; am I right?! I used the same filling from the cake recipe, but instead of topping the French toast with boring old whipped cream, I combined whipped cream with cream cheese and added orange zest and vanilla.

These pieces of French toast are like little clouds. The brioche is the perfect, pillowy vessel for the tangy strawberry-rhubarb filling.  The rubarb gives you a nice balance to offset the sweetness of the strawberries. The whipped cream/cream cheese combination gives you an exceptionally light topping for the French toast with a burst of orange flavor.

DSC_0208

Just look at that beautiful filling! Strawberries and rhubarb are not in season for much longer, so you need to make this dish ASAP. It would make for a perfect Mother’s Day Brunch.

Strawberry Rhubarb Stuffed French Toast with Whipped Orange Cream Cheese

Serves 4

Ingredients

1 loaf brioche bread

3 eggs

1/3 cup half and half

½ tsp cinnamon

½ tsp vanilla extract

4 tablespoons butter

Extra sliced strawberries and powdered sugar, for garnish

For the strawberry-rhubarb filling:

2 stalks rhubarb, cut into 1 inch pieces

¼ cup plus ½ tablespoon granulated sugar

½ cup thinly sliced strawberries

For the whipped orange cream cheese:

½ cup cold heavy cream

4 oz softened cream cheese

1 tsp orange zest

½ tsp vanilla extract

2 tablespoons powdered sugar

Instructions:

  1. Combine the rhubarb, ¼ cup sugar, and 2 tablespoons of water in a small saucepan. Bring to a simmer over medium heat and continue to cook until it becomes a thick puree, around 15-20 minutes. Set aside to cool.
  2. Once the rhubarb puree has cooled, fold in the sliced strawberries and the ½ tablespoon of sugar. Set aside.
  3. Whip the heavy cream in a medium bowl with an electric mixer until soft peaks form, around 6 minutes.
  4. In a separate bowl, whip the cream cheese until light and fluffy, about 20 seconds.
  5. Add the cream cheese to the bowl with the whipped cream. Add the orange zest, vanilla, and powdered sugar. Beat until well combined, about 1 minute. Set aside.
  6. Combine the eggs, half and half, cinnamon, and vanilla in a shallow bowl.
  7. Slice the brioche bread into 1.5 inch slices. You don’t have to break out the ruler here, but you want the bread to be thick enough to form a pocket for the stuffing.
  8. Using a knife, make a slit in the bottom of each slice. This is the pocket where your filling will go. Stuff each slice with around 2 tablespoons of filling.
  9. Dunk each slice of stuffed brioche in the egg mixture. Make sure that each slice has a nice coating.
  10. Melt 2 tablespoons of butter in a large skillet. Fry the brioche, 2 slices at a time, in the skillet until golden brown. Repeat with the remaining 2 tablespoons of butter and the remaining 2 slices of brioche.
  11. Top each slice of French toast with a healthy dollop of the whipped orange cream cheese. Garnish with additional sliced strawberries and powdered sugar, if desired.

Garlic Pasta

DSCN0930

In all the years I thought about making a food blog, I always knew this would be the first recipe I would post. My love of food and passion for cooking go all the way back to childhood, but this was one of the first simple dishes I learned to master and perfect in high school.

I’m convinced that some of the best dishes in life have minimal ingredients but loads of flavor. When I was in Italy last year, the best thing I ate the whole trip was a bowl of risotto that was served out of a giant wheel of parmesan. All it was: risotto, butter, white wine, and parmesan cheese. Seriously! Now, there are times when I love to work with a long list of ingredients and see how many different textures and flavors I can work into one dish. But those kinds of meals are for Saturday experiments and are not practical for a weeknight. This pasta dish is a bi-weekly staple in my life. It’s SUPER easy, comforting, and delicious!

It all started when my sister Erika studied abroad in Germany during my freshman year of high school. When she came home for Christmas Break after the first four months of being away, I was ecstatic to spend every moment with her for a few weeks, soaking up all the details from her adventures abroad. We had sleepovers every night that December and usually stayed up until 2-3 AM just laughing and talking about life. We always snuck into my parents’ kitchen for a late night snack—but in my house, late night snacks usually aren’t something simple like a bag of chips. Strombergs always have to go and make a mess; we have to get out pots, pans, and cutting boards to whip up something to suit our late night cravings. Just ask Eric—we have a deal that I do all the cooking and he does all the cleaning. That poor man is always cleaning up the hurricane I leave behind in the kitchen!

Erika had a friend from Albania who taught her how to make this garlic pasta while she was abroad, and when she came home she shared it with me. It has since become a staple in our household. It is essentially pasta aglio e olio, but with a twist (the secret ingredient that makes this pasta a little different: paprika!). This pasta is simple, garlicky, and will easily fix a late-night hankering for carbs. I have added my own flares to the original recipe, and I have a few variations of the recipe depending on what I’m in the mood for or who I’m cooking for (stay tuned for my post on what I call Eric’s pasta—coming soon).

This is the pasta you make when you only have 15 minutes to whip up a quick dinner. This is the pasta you make when you want a warm, comforting bowl of carbs on a cold night. This is the pasta you make at 3 AM when your sister is in town and you both need a late night snack. This is the pasta you make for your 6-year anniversary dinner on a school night so you’re short on time but you really want pasta and you love each other enough to eat something loaded with garlic for a romantic dinner. Have I mentioned how often I make this pasta?

It’s very simple, and it doesn’t have many ingredients. So I cannot stress enough that the ingredients you use have to be top notch quality!

A quick word about cheese: if possible, you should ALWAYS use freshly grated cheese. I have not purchased pre-shredded cheese of any kind in 2 years and I have never looked back. It only takes an extra minute to grate cheese by hand but it makes a world of a difference, trust me!

DSCN0933

Garlic Pasta

Serves 4

Ingredients

1 lb linguine, spaghetti, or other long noodle of your choice

2/3 cup good quality olive oil

5-6 garlic cloves, finely minced

1 tsp paprika

1/2 tsp red pepper flakes

½ bunch fresh Italian parsley, finely chopped

½ cup freshly grated Parmigiano-Reggiano cheese, plus extra for serving, if desired

Directions

  1. Bring a large pot of water to a boil & season generously with salt. Cook the pasta until al dente.
  2. Meanwhile, heat olive oil in a small pan over medium heat. Add garlic, paprika, and pepper flakes and cook for 3-5 minutes.
  3. Drain pasta and immediately toss back into the pot. Pour olive oil mixture over the pasta and toss to coat all the noodles.
  4. Top the pasta with the fresh Parmesan and parsley & serve.