Chickpea Caesar Salad with Lemony Thyme Breadcrumbs

DSC_0705.JPG

Oh blog, how I have missed you! It’s only been one week, but I hate that I missed my 2 posts-per-week mark. Alas, the Fall semester is back in full swing and that’s just what happens when you are working on your Master’s and a food blog at the same time. Luckily I only have a few more months to go before this grad school journey has come to an end. I’m hoping to get into a new routine to keep the blog consistent, but things might get a little hectic this semester.

In other news, Eric and I moved to an adorable farm for our last four  months up in the mountains. We eat dinner every evening outside joined by the company of a sweet white lab, a cat, and a goat. You could say I’m in heaven. When I take my veggie scraps to the compost every day I save some scraps for Crook (named that because he has a crooked neck due to scoliosis), the goat who acts like a dog and comes to you when you call him. Life has been quite good lately.

DSC_0702.JPG

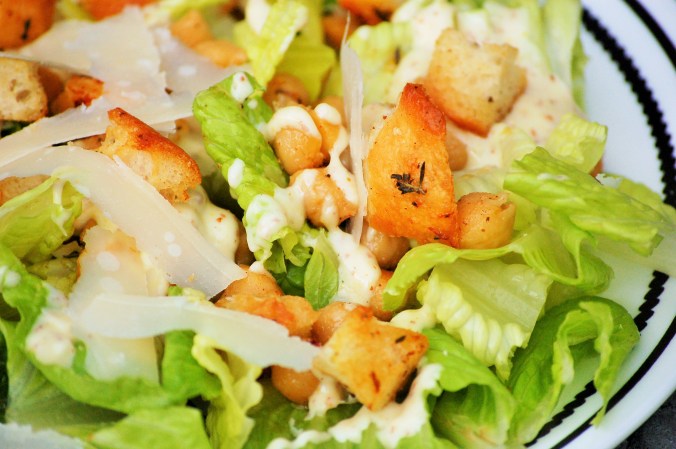
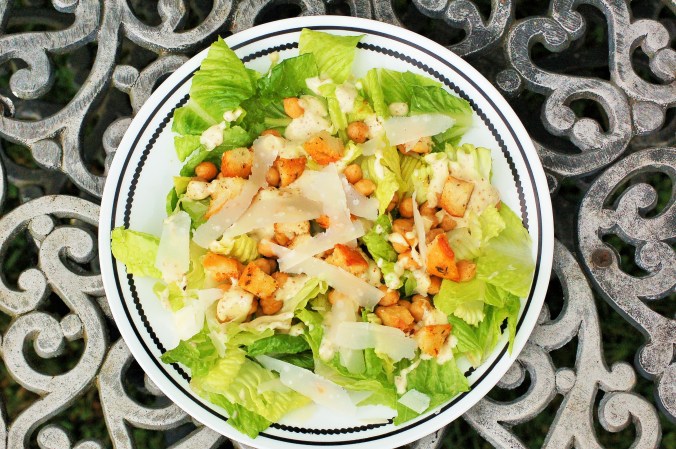
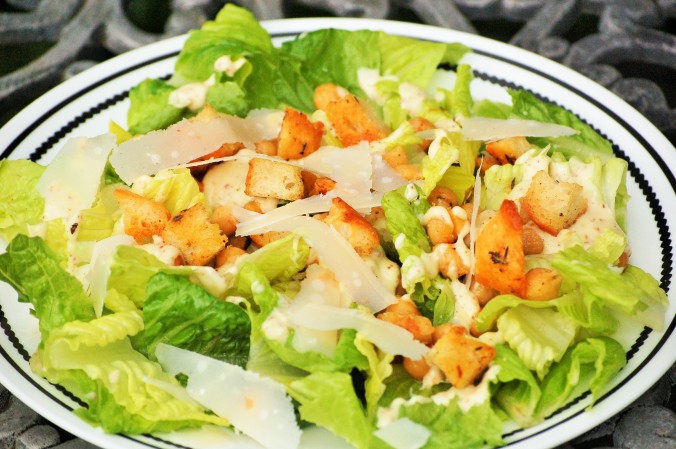
Today I’m sharing a chickpea Caesar with the most amazing breadcrumbs ever. The breadcrumb idea is an adaptation of my Aunt Donna’s lemon-thyme breadcrumbs, and let me tell you they are simply fabulous. I used up a stale baguette I had lying around the house, seasoned it with fresh thyme, lemon zest, and Parmesan cheese. The result is these bright crunchy cubes of deliciousness. I would say that the chickpeas are the star of the salad, but I’m not ashamed to admit it’s really the breadcrumbs. I may have had some self-control issues as I was dividing them not-so-evenly among the salad plates. And you know what I did with the leftovers? Rolled them all in a big flour tortilla for a delicious lunch wrap. Ohhhhh yes.

DSC_0707.JPG

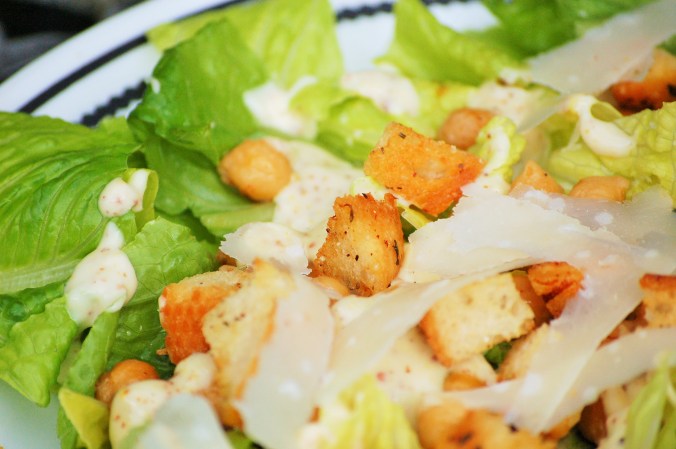
I love a good Caesar salad. It’s so savory and salty, and it has such a nice richness that not a lot of salads can offer. I had the idea to add chickpeas because they are my go-to for vegetarian protein substitutions. They are lightly seasoned with paprika, garlic powder, and thyme and then crisped up in some olive oil. If you’re not a vegetarian and you wanted to make this salad with chicken, I’m sure it would work very well in place of the chickpeas.

I’m sorry for the lack of posts last week, but hopefully you can make this salad soon and all will be forgiven after you taste it!

DSC_0703.JPG

Chickpea Caesar Salad with Lemony Thyme Breadcrumbs

Serves 4 

Ingredients:

2 cans chickpeas, drained and rinsed

5 Tablespoons olive oil

1/4 teaspoon paprika

1/4 teaspoon Herbes de Provence

1/2 teaspoon garlic powder

2 heads Romaine lettuce, chopped

Fresh Parmesan, for shaving over the top (roughly 1/4 cup over each salad)

1 batch Caesar Salad Dressing

For the lemony thyme breadcrumbs– 

2 cups cubed stale bread

1 heaping Tablespoon Parmesan cheese

1/2 teaspoon lemon zest

1 teaspoon fresh thyme, chopped

2 Tablespoons olive oil

Directions:

  1. Make the breadcrumbs: Preheat the oven to 350 degrees. In a medium bowl, combine the bread cubes, thyme, lemon zest, Parmesan cheese, and olive oil until all the cubes are nicely coated. Lay the bread cubes in a single layer on a cookie sheet and bake in the preheated oven for 10 minutes, shaking the cubes around halfway through the cooking time. Set aside.
  2. In a large pan over high heat, add the 5 Tablespoons of olive oil and heat until the oil is shimmering. Add the chickpeas to the oil and season with the paprika, garlic powder, Herbes de Provence, and salt and pepper (to taste). Allow the chickpeas to crisp up in the oil, about 8 minutes or so. Remove from the heat and allow to cool slightly.
  3. Divide the romaine evenly between the plates. Top each bed of lettuce with chickpeas, freshly shaved Parmesan, and a healthy drizzle of the Caesar dressing. Top with breadcrumbs and serve.


Portobello “Cheesesteak” Sandwiches

DSC_0711.JPG

I have never been to Philadelphia and I know nothing about what constitutes a true Philly cheesesteak. I do know that I absolutely love my creation of a vegetarian cheesesteak, whether or not it approximates the authentic Philly style version.

This sandwich is So. Savory. So cheesy. So rich and flavorful! The portobellos are sauteed in butter with a little bit of soy sauce to give them that meaty, savory element. The cheese sauce is a combination of sharp cheddar and cream cheese, so it has a nice tang to it. Sauteed peppers and onions give you that sweet veggie flavor to balance out all that richness. Oh, and the whole thing is nestled within an herbed garlic butter baguette. Oh yes, you read that right. This sandwich is a vegetarian dream.

You’re going to want to know that this is not exactly a light sandwich. My favorite way to cook mushrooms is in an ample amount of butter. And then there is garlic butter on the bread. And then there is a creamy cheese sauce drenched over everything. But hey, a cheesesteak isn’t exactly health food. It’s an indulgent sandwich that makes you feel like you’re eating fast food. But it’s so much better when it’s homemade!

I’m going to shamefully admit that I did not get a lot of good pictures for this post. The reason being that I hadn’t had breakfast and was dreaming up how I was going to make these sandwiches all morning. When lunch finally rolled around, I was so hungry and my mouth was watering by the time they were done and well… I just didn’t last very long through the photo shoot. This just means you are going to have to try these out yourself to really get a good idea of what they taste like.

DSC_0716.JPG

Portobello Cheesesteaks

Serves 4 

Ingredients:

1 baguette loaf (for this sandwich a slightly softer loaf is preferred)

4 large portobello mushrooms, thinly sliced

2 teaspoons soy sauce

1 medium yellow onion, thinly sliced

1 green bell pepper, cut into thin strips

1 Tablespoon olive oil

10 Tablespoons butter, divided (4 Tablespoons need to be room temperature)

1 clove garlic, minced

1/4 teaspoon dried oregano

1/4 teaspoon dried basil

1/8 teaspoon crushed red pepper flakes

2 Tablespoons all-purpose flour

1 cup whole milk

4 oz sharp cheddar cheese, grated

2 oz cream cheese

Directions:

  1. Preheat the oven to 350 degrees.
  2. In a medium skillet, heat the olive oil over medium-high heat. Add the sliced onions and peppers, season with salt and pepper, and cook until they start to get some color and are completely soft, about 6-8 minutes. Set aside.
  3. Divide the baguette into 4 segments. Cut open each segment like a book (not cutting all the way through).
  4. Combine the softened 4 Tablespoons butter with the minced garlic, oregano, basil, and red pepper flakes. Spread the butter mixture inside each baguette segment. Place the segments on a cookie sheet and bake in the preheated oven for 10 minutes.
  5. In a medium skillet over high heat, melt 4 Tablespoons of butter. Add the sliced portobellos in an even layer and do NOT stir. Allow them to get some nice color on one side before stirring them around. When they have sat in the hot butter for 3-4 minutes, stir and continue to cook for another 3-4 minutes. If the skillet starts to look dry, drizzle in olive oil as needed. When the mushrooms are almost done, add in the 2 Tablespoons of soy sauce and freshly cracked pepper. Stir, turn off the heat, and set aside.
  6. To make the cheese sauce: in a small pot, melt remaining 2 Tablespoons butter over medium heat. Slowly whisk in the 2 Tablespoons of flour and cook for 2 minutes, or until the flour and butter are nicely incorporated. Slowly whisk in the milk and continue to whisk until the mixture is nice and thick, about 5 minutes. When the mixture has thickened, turn off the heat, add in the cheddar and cream cheese, and stir until cheese is completely melted.
  7. To assemble the sandwiches, divide the pepper and onion mixture as well as the sauteed mushrooms evenly between each baguette segment. Smother each sandwich with desired amount of cheese sauce.

Strawberry Basil Ricotta Toasts

DSC_0700.JPG

I believe that something magical happens when you heat fruit in a saucepan. It breaks down the fruit and turns it into a luscious, sweet, compote that tastes like the inside of a pie.

Sometimes I want a sweet breakfast without having to fuss over the stove or oven all morning to make cinnamon rolls or pancakes or what have you. This ricotta toast is so simple and yet so satisfying! Creamy vanilla ricotta, sweet  and warm strawberries with a touch of basil to give it something fresh and unique, and toasted almonds. That’s it!

One of the things I love about Italian cheeses are their versatility. It is so awesome to use ricotta or marscapone cheese in a sweet dish one day, and then in a savory dish the next. No matter what, you get that silky creaminess and tang from the cheese, but you can add whatever spices you want to change it up and work for your dish. If I can find a way to use cheese in my desserts or sweet breakfasts,  you better believe I’m going to do it.

DSC_0704.JPG

I would like to make a side note that the only reason the bread is cut slightly crooked is because it was literally still warm from the bakery when I picked it up and brought it home. Have you ever tried to cut fresh bread? It’s a little challenging. But the freshness it brought to the dish was worth it!

This is a really simple dish that once again looks impressive but is truly a cinch to throw together. Instead of offering a guest regular toast for breakfast, you can serve something like this and it just makes it extra special. You could also change it up if strawberries aren’t your favorite. I’m sure peaches, apricots, or blueberries would make excellent substitutions here! Personally, I find that strawberries and cream are a match made in heaven. When the juices from the warm strawberries start to melt into that creamy ricotta you kind of feel like you are eating a strawberry shortcake. For breakfast. I mean, what more could you want?

DSC_0706

Strawberry Basil Ricotta Toasts

Serves 2 

Ingredients:

2 slices thick-cut bread, toasted

1/2 lb strawberries, trimmed and sliced

1 Tablespoon water

1 Tablespoon granulated sugar

1 heaping Tablespoon fresh chopped basil

1/2 cup whole-milk ricotta cheese

1/2 teaspoon vanilla extract

1 Tablespoon powdered sugar

3 Tablespoons sliced almonds, toasted in a dry skillet

Directions:

  1. In a small saucepan, heat the strawberries, granulated sugar, water, and basil over medium heat. Cook for 8-10 minutes, or until the strawberries have broken down and the sauce has thickened slightly. Turn off the heat and set aside.
  2. In a small bowl, combine the ricotta, powdered sugar, and vanilla. Mix to combine and spread on top of the slices of toast.
  3. Top each ricotta toast with the strawberry mixture and the toasted almonds.


German Plum Cake (Zwetschgendatschi)

Use.JPG

One of the many reasons I love Germans is that they regularly eat coffee and cake in the afternoon (well, at least all of our friends do). I may or may not gain a few pounds after spending time in Germany simply because I eat so much cake. German-style cakes are simply fabulous! They are not as sweet as American cakes, and they tend to use lots of nuts and fresh, seasonal fruits. A late summertime favorite in Bavaria is plum cake, or Zwetschgendatschi.

use 2.JPG

DSC_0691.JPG

Someone  was super interested to see what all the fuss was about while I was photographing the cake. He was extremely disappointed when I told him he couldn’t have a piece. I almost gave in though, because… that face! What a cutie pie.

The first time I took Eric to Germany, he was kind of surprised at how frequently we consumed cake and coffee. Walking around new cities, rather than going to museums, we often scoped out the best bakery we could find and stopped for cappuccinos and cake. Walked some more. More coffee. Maybe more cake. Hey, when you vacation with a Stromberg, the main event of any destination is the food. What can I say?

use1.JPG

My mom and I adapted a recipe we had been using online for years and created the plum cake I’m sharing today, which is a little different from the traditional German-style cake. We added walnuts to the crust, which give it a nice nutty flare. Cinnamon and sugar on the top of the cake provide a final kiss of sweetness and warmth, making this cake just divine. The plums are packed in very tight rows along the buttery crust, ensuring that no bite goes plumless. Served with a healthy dollop of fresh whipped cream, it just can’t be beat. (Side note: Germans are not afraid to really go heavy on the whipped cream. The cake has a lot less sugar than your average cake, so treat yourself to some extra calories with all that glorious whipped cream 😉 ) Not to mention, who expects plum cake? It’s so unusual in the States. I grew up eating plum cake on the regular on hot, August afternoons.

I went to an international high school, and we often did giant potlucks a few times a year when the entire lunch table became a sort of mini-international festival, boasting food from around the globe. When I would whip out this little plum cake, my fellow Germans at the table would squeal with delight.

I hope you can try out this plum cake and get a taste of a German favorite.

use def

German Plum Cake (Zwetschgendatschi)

Serves 6-8

Ingredients

1 cup plus 3 Tablespoons all-purpose flour

1/2 cup walnuts, finely ground in a food processor

1 stick plus 2 Tablespoons salted butter, softened

6 Tablespoons granulated sugar, divided

1 egg yolk

1 lb small, black plums

1 teaspoon cinnamon

Fresh whipped cream, for serving

Directions:

1. Preheat the oven to 375 degrees.

2. In a medium bowl, combine the ground walnuts, flour, butter, and 5 Tablespoons of the sugar. Mix with your hands until a soft dough forms. Add the egg yolk and mix with your hands until the dough is coming off the sides of the bowl.

3. Press the dough evenly into a 9″ x 13″ baking sheet.

4. Slice each plum in half, remove the pit, and slice each half into 4 slices. Arrange the plums in tight rows on top of the crust so the slices are standing up (skin side down). Sprinkle the cake with the cinnamon and the remaining sugar.

5. Bake the cake in the preheated oven for 25 minutes. Allow to cool slightly and serve with fresh whipped cream.

*Note: Recipe adapted from http://www.cooks.com/recipe/ul6z47xx/german-plum-cake.html


Dijon & Herb Crusted Salmon with Creamy Leeks and Crispy Potatoes

DSC_0705.JPG

If you are looking for a fancy yet easy complete meal for your next date night, this is it. It was another one of those dishes that I had out at a local European restaurant and just had to figure out how to recreate it at home. My Mom appears to have figured it out! She’s been making this dish for roughly a year now, and it’s about time I got around to blogging it. It’s a five-star meal loaded with flavor, but it’s so simple to make.

I love the balance of textures going on in this dish. You’ve got a layer of ultra-crispy potatoes on the bottom, topped with a layer of creamy leeks, followed by tender salmon with grainy mustard and a crunchy topping. It’s to die for! I don’t eat fish very often, but I’ll make an exception for this dish because it’s just too good.

It’s been a bit of a rough week having to only eat soft foods since my oral surgery. I felt like a puppy sitting at the table, longingly staring at everyone else’s plates while I ate overcooked Mac ‘n’ cheese and smoothies. Luckily, I’m almost back to normal! Crunchy foods, I’m coming for ya (soon). Can I also say, WHY do people feel the need to share with me everything that went wrong during/after their oral surgery procedures?! I went to a cooking class last night and I told one of my fellow classmates that I just got my wisdom teeth out. His response was “Not to scare you or anything, (at which point I should have told him to  stop talking), but when I got mine out they healed up just fine and then a week later I got an abscess and my whole neck swelled up and it was a whole thing and $2000 I’m still dealing with the aftermath.” Gee, thanks. I’m glad you shared your completely non-helpful tidbit about the horror following your surgery. Here’s hoping that doesn’t happen to me!

DSC_0697

Ok, sorry for that little tangent. Just know, if you had a bad experience following a medical procedure, it’s probably best not to tell someone who just had said medical procedure done.

…But back to the food. The reason you’re here reading this. When I do splurge to eat fish, I like to get the highest quality, most sustainable fish I can get. The salmon used in this recipe was wild Alaskan Coho Salmon, and I would definitely recommend the Coho over Sockeye, if you can find it.

Disclaimer: This recipe is easy, but it uses quite a few pots and you have to attend to each component of the dish. I would highly recommend reading through the entire recipe before starting so that you can have your prep work done and make it a less stressful event!

DSC_0690

Dijon & Herb Crusted Salmon with Creamy Leeks & Crispy Potatoes

Serves 4

Ingredients:

2 lb Wild Alaskan Coho Salmon

1/2 cup grainy dijon mustard

1 1/2 cups panko bread crumbs

3 Tablespoons olive oil, divided

2 Tablespoons chopped fresh Italian parsley

Zest of one lemon

For the potatoes–

2 large potatoes, diced

2 Tablespoons butter

For the leeks– 

2 leeks

2 1/2 Tablespoons butter

2 Tablespoons flour

1/2 teaspoon freshly grated nutmeg

1 1/2 cups whole milk

Directions:

  1. Preheat the oven to 350 degrees.
  2. Slice the leeks in thin rounds and place in a medium bowl. Fill the bowl with water and allow the leeks to sit for a few minutes, to allow any gritty material to sink to the bottom of the bowl. Drain and set aside.
  3. To make the potatoes: In a medium skillet over medium-high heat, fry the potatoes in the butter and season with salt and pepper, stirring only occasionally, about 15 minutes. Set aside.
  4. To make the creamy leeks: In a small pot over medium heat, melt the 2.5 Tablespoons butter. Slowly whisk in the flour and allow to cook for 2-3  minutes. Add in the milk and fresh nutmeg, as well as salt and pepper. Allow this mixture to simmer for 10-15 minutes, until thick and creamy. Throw in the sliced leeks and allow to cook for another 1-2 minutes. Turn off the heat and set aside.
  5. While the leeks are cooking, cut the salmon into 4-5 pieces. Divide the mustard evenly between the salmon pieces and smear a generous amount on the top of each piece.
  6. In a small bowl, combine the panko bread crumbs, 1.5 Tablespoons of the olive oil, lemon zest, and chopped parsley. Divide the crumb mixture evenly between the salmon pieces and firmly press the crumbs into the top of each piece. Season with salt and pepper.
  7. In a large, oven-safe skillet over medium-high heat, fry the salmon (skin side down) in the remaining 1.5 Tablespoons of the the olive oil for 10 minutes.
  8. Transfer the skillet to the preheated oven and bake the salmon for 12 minutes. Then, turn the broiler on high and broil for 3-5 minutes, but check frequently to make sure the salmon isn’t burning!
  9. Serve each plate with a base of crispy potatoes topped with the creamy leeks. Top this with a piece of salmon and a lemon wedge.


Sweet Potato & Corn Cakes with Sage & Pequin Chile Butter

Use.JPG

One of my favorite things to do is form something into a patty, season it with tons of different flavors, crisp it up, and eat it with an egg. I do this with chickpeas, black beans, and in today’s post…sweet potatoes. I used to hate sweet potatoes because I had only ever had them at Thanksgiving, when they are loaded with brown sugar. In my (unpopular) opinion, sweet potatoes are perfectly sweet alone and they need savory ingredients to contrast all that sweetness. That’s where the salty, herby butter topping these bad boys comes into play.

Compound butters are a great and easy way to add unique flavor to a number of different dishes. In this case, I simply added fresh sage and some pequin chile salt I had on hand (shout-out to Elaine for getting Eric and me a 6 month RawSpiceBar subscription), and voila! Instant flavor burst. The best part is when the butter starts to melt on the hot, crispy surface of the freshly griddled potato cake. It starts to sink into all the nooks and crannies of the cake and you get that lovely aroma of fresh sage. The pequin chile flakes add a smoky, spicy kick which goes really nicely with the sweet potatoes.

Use maybe.JPG

Look at that gorgeous butter melt its way into that cake! I’m crying a little on the inside because I’m having my wisdom teeth taken out today and looking at these pictures is making me long for crispy, crunchy textures I cannot have for a few days. Being as obsessed with food as I am and being severely limited in what consistencies you are able to eat is pure torture. I have a whole new appreciation for working with clients who have swallowing disorders and are unable to eat regular diets. I have considered one day merging my love of food blogging with my knowledge of speech-language pathology to release a series of recipes specifically designed for individuals with dysphasia. Stay tuned, speechie friends!

I have made different variations on sweet potato cakes before, and recipes almost always want you to boil or microwave the sweet potatoes. It gets the job done as far as cooking the potatoes, but personally I find that roasting them in the oven gives them a nice color and extra layer of flavor. Also, it is an absolute MUST that you eat these cakes with a crispy fried egg. If you need tips on how to get it super crispy, refer back to this post. The combination of that runny yolk with the compound butter and the crispy sweet potato cake simply cannot be beat.

Use1

Sweet Potato & Corn Cakes with Sage & Pequin Chile Butter

Serves 4

Ingredients:

For the sage & pequin chile butter– 

6 Tablespoons unsalted butter, softened

1 Tablespoon finely chopped fresh sage

1/2 teaspoon pequin chile salt (If you can’t find this, you could simply do 1/2 tsp salt and a dash of pequin chile powder, or red pepper flakes).

For the sweet potato cakes– 

4 sweet potatoes, peeled and diced

1 cup frozen corn

2.5 Tablespoons olive oil, divided

1/2 yellow onion, diced

2 cloves garlic, minced

2 Tablespoons heavy cream

1/2 teaspoon cumin

1/4 teaspoon smoked paprika

1 egg

1/2 cup panko bread crumbs

Salt and freshly cracked black pepper, to taste

Sunflower oil, for frying

Crispy fried eggs, for serving

Directions:

  1. To make the compound butter: Combine the butter, sage, and pequin chile salt in a small bowl. Empty the mixture onto a large sheet of parchment paper and roll the butter into a log shape (it should look kind of like a candy wrapper). Allow the butter to harden in the refrigerator, about 2 hours.
  2. Preheat the oven to 400 degrees. Arrange the diced sweet potatoes on a large sheet pan and drizzle with 2 Tablespoons of the olive oil. Season generously with salt and pepper. Roast in the oven for 30-40 minutes, or until tender.
  3. Meanwhile, in a medium pan over medium heat, saute the onion and garlic in the remaining 1/2 Tablespoon of olive oil for 3-4 minutes. Add in the frozen corn, season with salt and pepper, and stir until warmed through. Set aside.
  4. When the potatoes have cooled slightly, mash them in a large bowl with the heavy cream until mostly smooth. Add in the corn mixture, cumin, smoked paprika, egg, and bread crumbs. Mix until nicely combined.
  5. To fry the cakes, heat a medium pan over medium-high heat with sunflower oil (around 2 Tablespoons). Form small patties from the sweet potato mixture and fry in the hot oil, about 3-4 minutes per side or until golden brown.
  6. Serve each cake with a fat slice of the sage & chile butter and a crispy fried egg.


Frozen Chocolate Mousse Pie

DSC_0641.JPG

World, meet my birthday cake. As in, the cake I have eaten for my birthday for roughly 15-20 years now. It’s simple, it’s sinful, and it’s chock full of chocolate. All the years growing up when my Mom asked what I wanted my special birthday meal to be, it was almost always eggplant Parmesan and chocolate mousse pie. My Mom has always made a big deal out of birthdays, and of course showed her love for us through food. Even though I just turned 25 yesterday (yay, lower insurance rates!), we still made this pie as a standing tradition.

DSC_0647.JPG

Does anyone else out there feel like they need a little bit of chocolate every day? Not a crazy amount, just a small piece after dinner every night? I’m like that. I get intense cravings for chocolate. My favorite desserts, therefore, are super chocolatey. This dessert is one of my all-time favorites!

I become a different kind of hangry when I don’t get my chocolate. A few years ago, Eric and I were vacationing in Asheville for the first time. I had heard of the French Broad Chocolate Lounge, but I had never been. Our first day exploring the city, I naturally had chocolate on the brain all day because I couldn’t wait to try it out. We had just finished a brewery tour and had been walking around in the heat. We were tired, and Eric really wanted to go back to the hotel and relax. I agreed, but he quickly noted something was wrong as I became quiet and grumpy on the walk back to the car. I don’t even remember what we argued about but we sat in the parking garage for 30 minutes and it was quite honestly my favorite argument ever because it ended with me emotionally crying out  “BUT I JUST WANTED TO GO GET THE CHOCOLATE!” We tried to keep straight faces because we were in the middle of an argument, but we couldn’t help but bust out laughing. We quickly made up and ended up walking to the chocolate lounge, enjoying delicious liquid truffles, and entering a full-blown chocolate coma. I guess the moral of the story is: don’t mess with Alex when she doesn’t get her chocolate.

DSC_0643.JPG

I have to admit that I never actually knew how she made the chocolate mousse pie until I made it with her this year. I was a little shocked at how insanely easy it is to make! It doesn’t even have egg whites, so it is technically not chocolate mousse, but it still maintains a light and airy texture. Normally, I would say that cake trumps pie every time. When the pie in question has a chocolate cookie wafer crust and the filling is loaded with chocolate… Well, I can make an exception.

DSC_0646.JPG

Frozen Chocolate Mousse Pie

Serves 8

Ingredients:

30 chocolate cookie wafers

6 Tablespoons butter,  melted

12 oz semisweet chocolate chips

1 Tablespoon Creme de Cacao

2 cups plus one Tablespoon heavy whipping cream

1 teaspoon vanilla extract

1 teaspoon instant espresso powder

3/4 cup mini semisweet chocolate chips

Dark chocolate, to curl for garnish (optional)

Directions:

  1. Using a food processor, grind the wafer cookies until they form fine crumbs.
  2. In a medium bowl, combine the cookie crumbs and melted butter. Press the mixture into a 9-inch springform pan using your hands. Refrigerate the crust for around 30 minutes, or until firm. Set aside.
  3. Using a double boiler, melt the chocolate chips over low heat until smooth. Add in the vanilla extract, espresso powder, Creme de Cacao, and 1 Tablespoon of the heavy cream. Stir to combine and turn off the heat. Allow the chocolate mixture to cool slightly, about 5-10 minutes.
  4. In a large bowl, beat the remaining 2 cups heavy cream until soft peaks form. Gently fold in the cooled chocolate mixture using a rubber spatula. Stir in the mini chocolate chips.
  5. Empty the chocolate mousse into the cookie crust and spread evenly. Freeze the pie for at least 2 hours but up to 8. When you are ready to serve the pie, allow to sit at room temperature for 30 minutes before eating. Garnish with dark chocolate curls, if desired.